Building my Dream Video Editing Workstation
It's been nearly a decade since my last PC build,. and although it's been an incredibly reliably machine, it started to become a big productivity bottleneck for modeling, recording, and editing videos. Trying to edit videos that were longer than 12-14 minutes started routinely crashing, CAD would start struggling with more technical designs, especially if I was trying to record the process. I was constantly playing hot potato with files that were entirely too large for my PC to process efficiently. The last two years have been nearly impossible getting PC components at retail prices with ongoing chip shortage demands, and dealing with the same in the automotive industry, I put off building a new workstation for longer than I should've. With next-gen hardware coming in late 2022, coupled with demand for Crypto PC's falling dramatically, I was able to save a lot while building an incredibly capable machine that'll hopefully last me another 10 years.
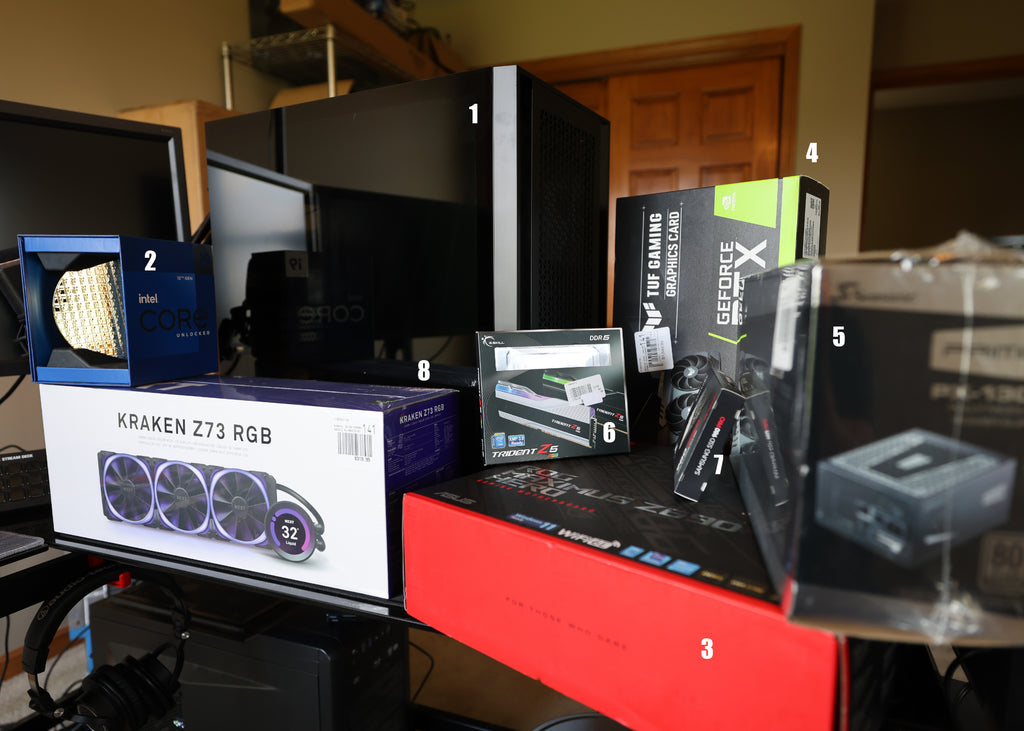
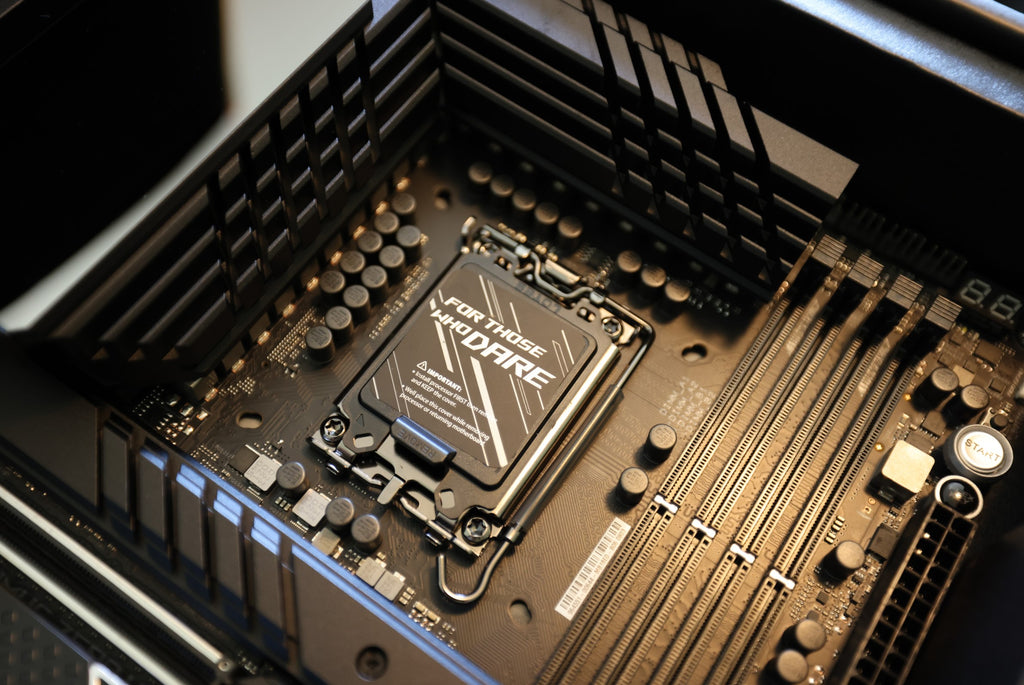
ASUS ROG Maximus Z690 Hero Motherboard
One of the downsides of my last PC build was that the hardware standards for several components were about to be superseded. This meant that even though the PC was lightning fast at the time, it would be the fastest it could ever be on that motherboard. Newer hardware wouldn't be compatible, so outside of upgrading the video card when my GTX780 failed (after 9 years), there wasn't any real headroom in the PC to upgrade down the road. When it came to the new build, I went with the ASUS ROG Maximus Z690 HERO Motherboard. I've used ASUS motherboards in over a dozen builds, and I've yet to have one fail. I went with this board for a number of reasons. The inclusion of USB-C, lightning, and USB3.2 ports on the back means I can connect to multiple generations of devices so charging, file transfer speed, etc. won't be compromised. The board also features DDR5 RAM compatibility, which is just coming into maturity, PCIE gen5.0, which next-gen graphics cards will use, while being backwards compatible to current PCIE gen4.0 cards. The CPU socket is LGA 1700, which works with current 12th gen Alder Lake Intel processors, and is expected to be carried into Raptor Lake 13th gen. Large heat sinks for the VRM & M.2 SSD, and an onboard diagnostics display are other features I appreciated for the longevity of the board. Pairing this motherboard with an Intel 12900K Processor, ASUS TUF 3080 TI Graphics Card, and Trident Z5 DDR5 6400MHz RAM, I'm not expecting this build to start feeling sluggish any time soon, but I'm glad the opportunity to upgrade later is available if I'll ever need to.
Cooling
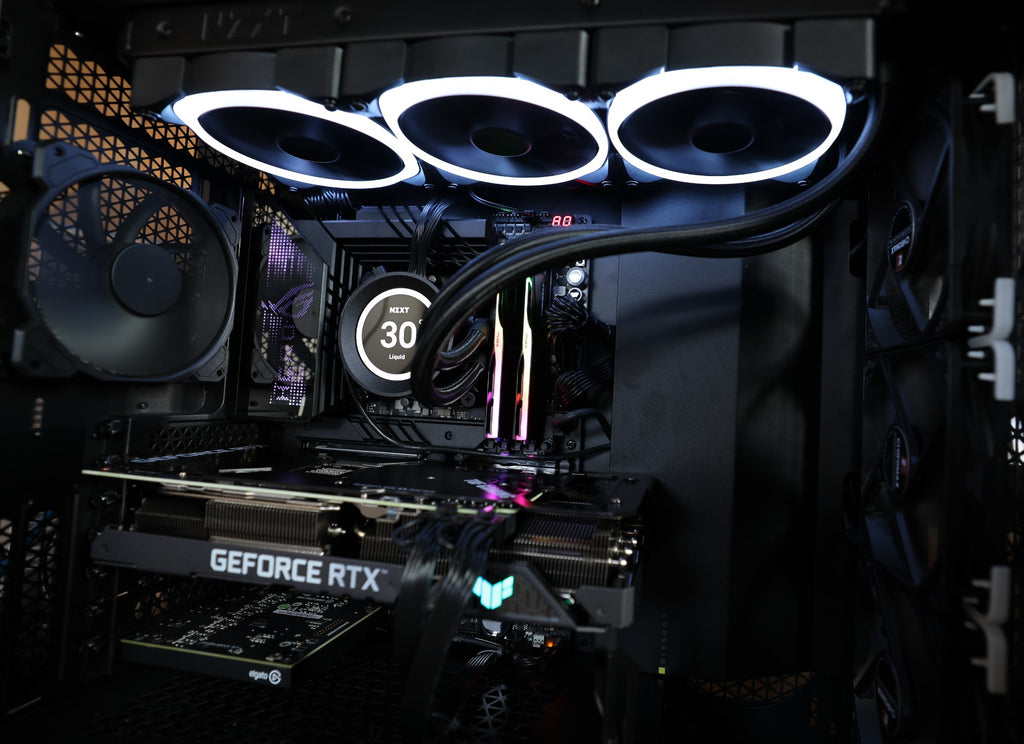
Cooling's an incredibly important consideration when planning and building a new system. I'd originally planned for a "custom loop", which involves a separate water pump, radiators, reservoir, and custom plumbing routed through the CPU and graphics card. The hardware involved with building custom loops is still hit or miss as far as availability, so to get the system up and running, I decided to pull the Noctua NF-S12A case fans that were running in my old PC, and use an NZXT All-In-One cooler for the CPU. All-in-One coolers are sealed systems with an internal pump that come pre-attached to the radiator and CPU cooling block. This simplifies water cooling a PC dramatically, at the downside of having less capacity than a custom loop. An AIO wouldn't be able to be tee'd into the graphics card, a separate reservoir, or multiple radiators, but it's a start, and means I can be up and running. When selecting an AIO, make sure to confirm whether or not the correct socket plate is included with the cooler or if you need to request one separately from the manufacturer. Even though LGA 1700 has been in circulation for awhile now, I was surprised to find that several AIO's don't automatically come with them.
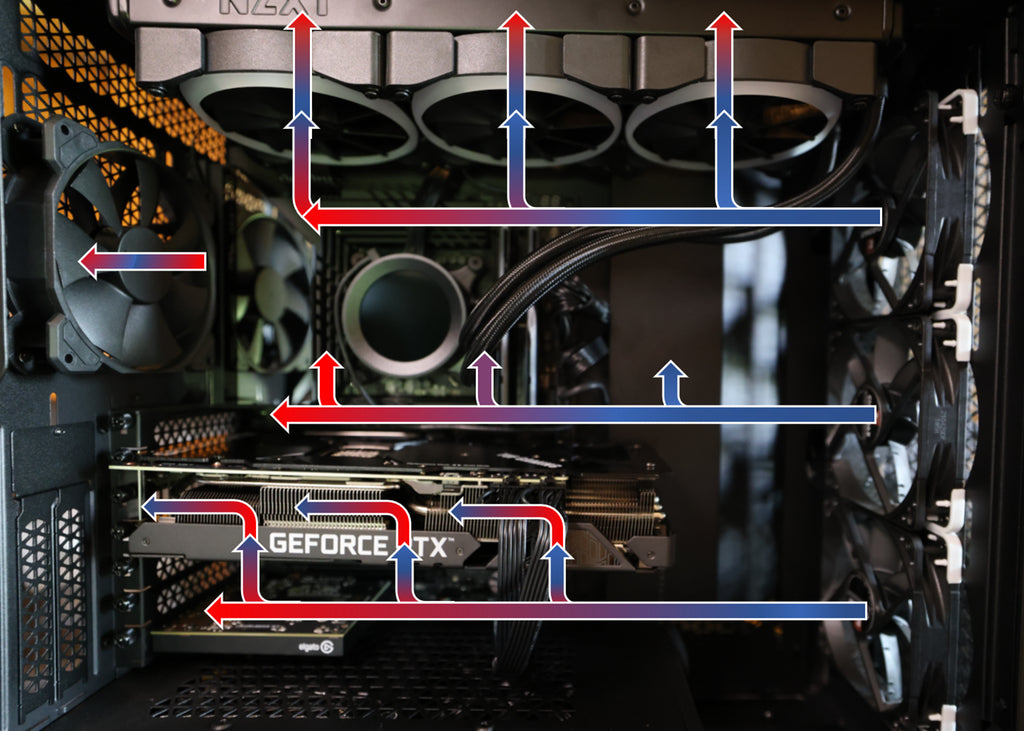
For this build, I'm pulling fresh air from the front of the case, and exhausting through the radiator mounted at the top, and the case fan at the rear. There's provisions for three additional intake fans at the backside of the case as well.
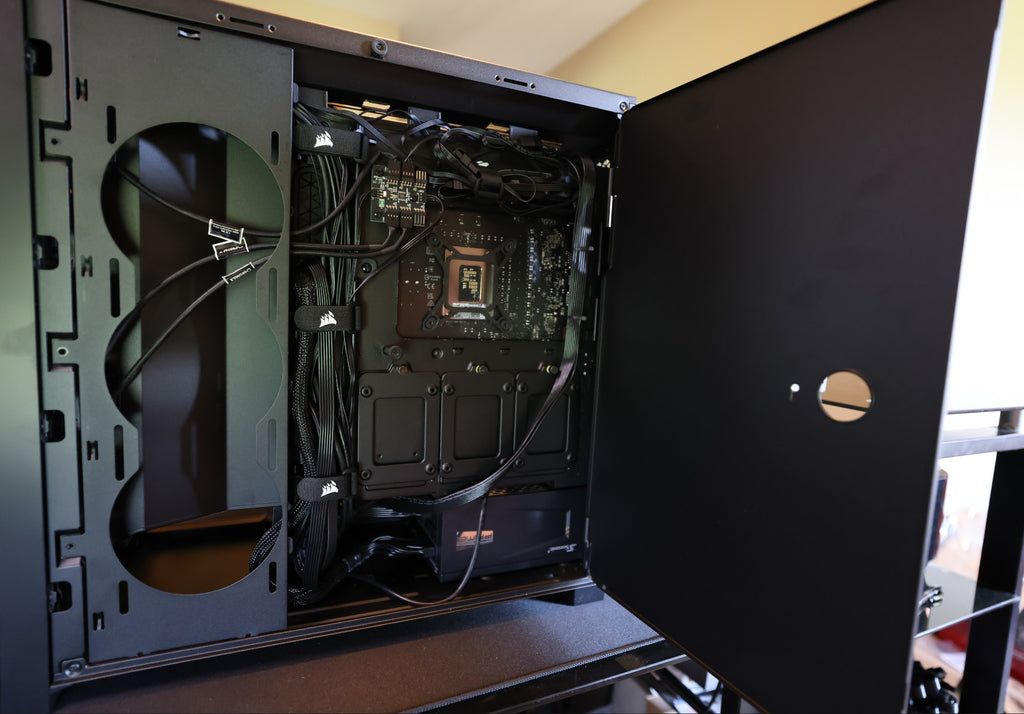
The biggest differences I noticed between this case and my previous builds was the heavy focus on wire routing. Separating the power supply compartments and moving the drive bays to the bottom/backside of the PC dramatically cleans up the internal airflow of the case. Having exposed ribbon cables everywhere can significantly interrupt airflow internally in a case, but in the photo above, the computer's completely wired, most of which has been tidily wrapped up and completely out of sight.
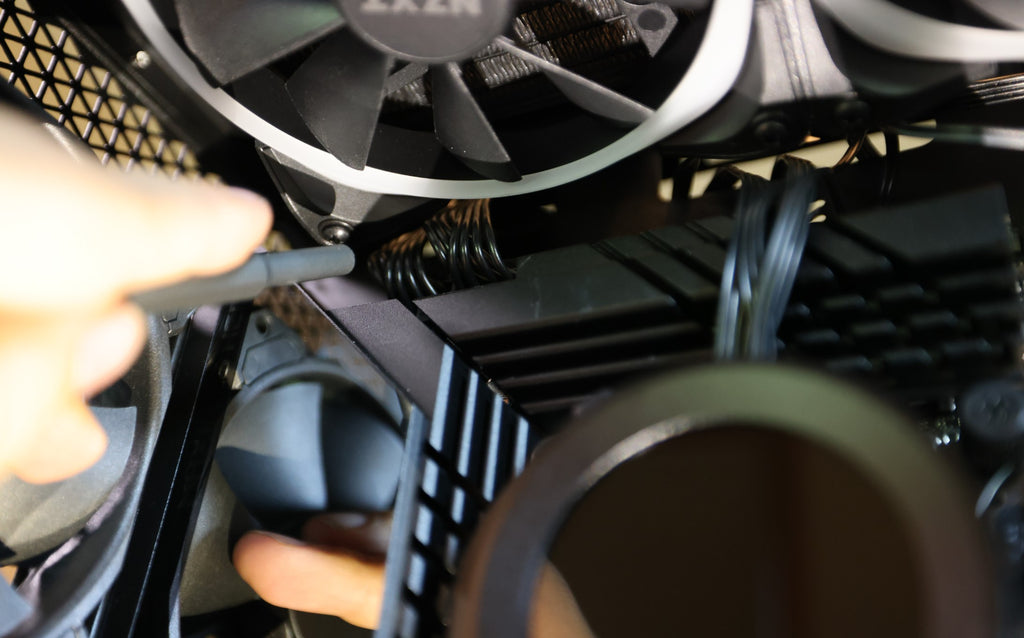
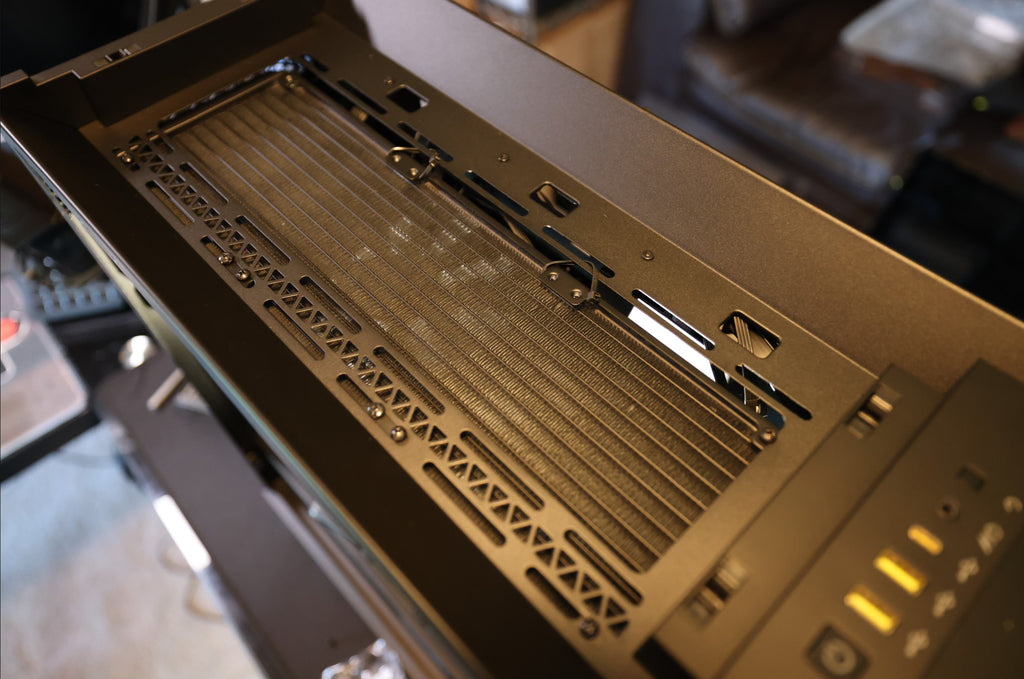
One issue I ran into mounting the radiator at the top of the case was the clearance to the power connectors on the top of the motherboard. With enough pressure against the wiring, the thick radiator would fit, but I wasn't comfortable leaving electrical connectors pinched that way. I wound up moving the radiator to the 140mm fan mount and zip tying the unsupported side of the radiator along with an extra bolt to hold it securely to the case. This gave plenty of room to the connectors on the motherboard, although the installation looks a little funky. There's a cover that'll hide the radiator completely anyways, and it's plenty secure.
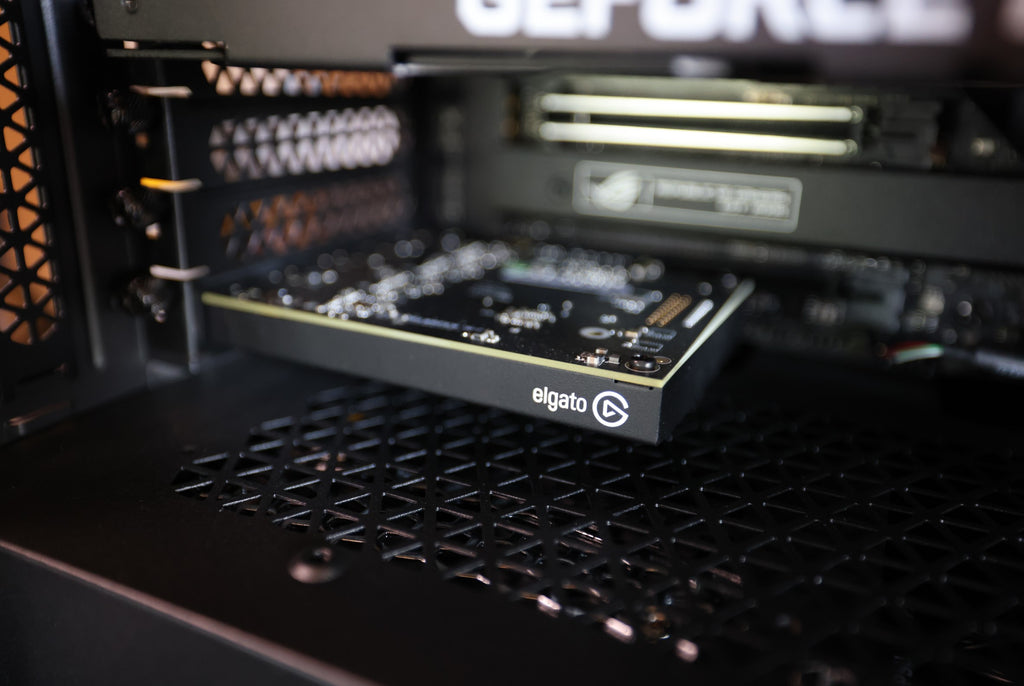
Elgato Cam Link Pro
Capture cards were popularized by streamers and gamers wanting to record console (Playstation, Xbox, etc.) gameplay, or to record themselves with a DSLR camera over HDMI while playing. What's nice about using a capture card is you're able to record directly to the PC, without needing to worry about having an SD card large enough for the files. Of course, this means you'll need a good sized hard drive on your computer (I opted for a Samsung 980PRO M.2 SSD for this build. I'd massively underestimated file sizes for content creation when I just started out. Another benefit of the capture card is being able to set up your camera as a webcam to dramatically increase the video quality for online meetings. You'll need to make sure your camera has an HDMI OUT port to connect to the card. I picked the Elgato Cam Link Pro because it features four HDMI ports, meaning I can record multiple camera angles in the design studio simultaneously. I want to start recording more design and CAD modeling content, and I thought this would be a great way to record myself, the desk, and possibly the 3D Printer all at once. There's a lot of utility in adding a capture card that I'm looking forward to taking advantage of in future videos. At the moment I'm only using a single camera in the studio, but I wanted to have this ready for once I can afford adding more down the road.
If you're just starting out, instead of the Cam Link Pro, I'd recommend considering an Elgato Cam Link 4K. Instead of connecting internally via PCIE, the Cam Link 4k simply plugs into USB3.0 to receive the HDMI signal from a single device. It's quite a bit less expensive than the Cam Link Pro, easy to configure, and is a simple, reliable solution for people only needing a single HDMI source. You'll need to make sure you have USB3.0 ports on your computer, older USB standards won't be able to keep up with the amount of data being processed from live recording (and I'm not even sure it'll recognize the device if I'm honest).
First Start
If you've ever felt the nerves from the first start of a project car, you'll know exactly how it feels the first time booting up a new PC. A couple of tips:
- If you're installing a fresh USB Version of Windows, you might need to set the BIOS boot drive to USB.
- POST (Power-On Self Test) might fail if you're using an all-in-one cooler. Depending on how you've wired the AIO, the motherboard might not detect a CPU cooler, which may need to be a disabled alert in the BIOS.
- Update firmware/drivers on the board, GPU, and all devices as soon as possible.
Personally I like to stress test PC's to make sure thermals and stability are OK once everything's been updated. I found nearly immediately that my processor was reaching 100*C within a couple seconds of initializing testing. This was not good. I noticed when I started the test, I wouldn't hear the fans ramp up at all, which was odd due to the BIOS being set to control the fans depending on the CPU temperature. After some investigating, I found the NZXT AIO had its own software needing to be downloaded, and that the BIOS fan settings were being overruled by the cooler's software. Once I installed NZXT's software, set the tuning speeds for the fans and the coolant pump, the fans would ramp up during stress testing, but after 15-20 minutes, would still overheat the processor. The cooler came with a round pad of thermal paste pre-applied to the processor. I pulled the cooler, cleaned off the paste, and reapplied my own. This brought temperatures down quite a bit, and a slight undervolt offset on the CPU brought me to a much more comfortable temperature range. Up and running, stable, and ridiculously fast, it's hard to believe I waited so long. The difference is beyond night and day. Processes that were previously taking 20-30 minutes were able to be accomplished in under a minute and I couldn't be more excited to start modeling and editing on it.